Tuesday, December 25, 2012

Managing Podcasts

I use iTunes to manage my podcasts. It works well, but it is vastly improved with the use of live-updating smart playlists.

What pushed me into figuring this out was using my iPod with my car radio. There was no way to tell which podcasts had already been listened to. To make it worse, the radio only displays part of the podcast title at a time, so it was difficult to tell which episode was which.

I set up a playlist for each of the podcasts I subscribe to which only includes episodes that have not been played. That is what makes it "smart."

As soon as an episode is played, it is removed from the playlist. This happens on the iPod automatically, without having to plug it into a computer or sync with iTunes. That is the beauty of live updating.

Here is how to do it:


First, create a new smart playlist by clicking on the File menu and New Smart Playlist...  (Or Ctrl+Alt+N)


Next, set up the two following rules and make sure that "Live updating" is checked.

The first rule is easy, and will be the same for every podcast you want to set up this way:

  • Plays is 0
The second rule needs to be something that will filter all the podcast episodes out of your entire music and podcast library. The secret I discovered to make this work with live updating on the iPod, is to only include data in the rules that exists on the iPod itself. You would think that Apple could disable the "Live Updating" checkbox if you choose data fields that won't work with live updating, but you would be wrong, apparently.  Choosing one of the following has worked well for me:
  • Artist contains [Artist Name]
  • Album contains [Album Name]
It should look like this. 


Note that this requires the artist name to be identical for all episodes of the podcast and unique from the artists of other podcasts or music. This would not work for the two NPR podcasts seen below. Both have NPR as the artist name.

In this case, I used the album name.


Using the new playlists is simple. Just go to "Playlists" on your iPod instead of "Podcasts" when you want to listen. It will show only the new episodes, and they will disappear like magic once they have been listened to. Smart, live-updating magic.

Tuesday, December 11, 2012

MagSafe Connectors

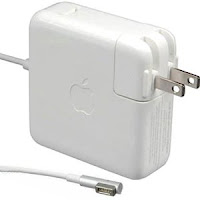
I love Apple's MagSafe connectors. They are a great way to quickly connect and disconnect a power supply. The magnets guide the connector into place. It is a brilliant piece of engineering and design. And magnets!

My one complaint is that I don't own a MacBook. That means I don't get to have one.

Don't get me wrong; I tried. Getting half of the connector is easy. All you need is a broken MacBook power supply.

The other half is much more difficult. It turns out that they only existed built into MacBooks. A broken one of those is more difficult to come by.


But then, Apple came out with this:  the MagSafe to MagSafe 2 Converter.

And with that tiny $10 adapter, it became easy to get a matched set of connectors. Woo!


Now a side bar in which I describe a different complaint and an opportunity for putting these connectors to good use.

Garmin GPS units used to have really good car docks. There was a series of contacts on the bottom of the GPS. The car charger plugged into the dock, and these contacts created a connection whenever the GPS was clipped in. Whenever you were using your GPS, it was supplied with power.

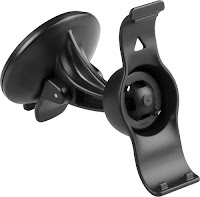
When my old GPS broke after several years, I purchased a new one. The new dock was disappointing, to say the least. It was just a plastic clip. It worked for holding the GPS in place, but that is all it did.

Power is provided from a separate mini-USB connection on the back. So now, you must plug in power and then the fit the GPS into the dock. Not the end of the world, I admit, but still an annoyance.

To make this easier, I made two adapters which allowed me to use the MagSafe connectors with my new Garmin.


I used the MagSafe to MagSafe2 converter and the male end of a mini USB cable to construct the first adapter. This is the one that attaches to the Garmin's USB port.

Disassembling the converter was not difficult, but I failed to capture any pictures of it. Here is a less-than-adequate description of the process. I used a vice to hold the body of the adapter (cushioned by a towel to avoid scratches), grasped the MagSafe2 end with a pair of pliers, and pried the end off. The adhesive and solder connections came apart relatively easily. Luckily, I did not need to reuse the MagSafe2 connector, it got a little scratched up.

Here you can see the MagSafe side of the adapter. The wires are coming out of the hole in the MagSafe2 side. The USB connector was bent at an angle to allow the wires to sit flat against the Garmin. 

These are the soldering connections:
  • I did not use the center-most pin of the MagSafe connector. Only two wires come from the MacBook power adapter. The center pin is connected within the end of that cable, and is used for the LED indicator. There is potential for it to be a useful third connection to supply something other than just power. (Like maybe the traffic antenna?)
  • The red wire is the positive side. It is connected to the positive USB pin and the remaining center two pins on the MagSafe connector. The connection is made to two pins so that the connector can be plugged in either direction. 
  • The black wire is the negative side. It is connected to the negative USB pin and the outer two pins on the MagSafe connector. 
  • There is one more connection that must be made within the USB connector so that the Garmin will recognize the power supply. Mini USB has 5 pins instead of four. That extra pin must be connected to the ground pin with a 17.3K ohm resistor. 

I found two sites that were incredibly helpful with figuring out the electrical connections. The first provided the following table with the pinout for the Garmin power connector.

PinPin
Name
Description
1+5V5 volts DC
2datanot connected / float
3datanot connected / float
XGNDconnected to pin 4 (GND) with 17.3K ohm resistor
4GNDground

The second site was the Wikipedia entry for USB. It had helpful diagrams of the standard USB connectors. 


Here you can see the adapter plugged into the Garmin. As you can see, I coated all the electrical connections with heat shrink tubing. I then used epoxy to further protect the wiring and connectors.


Next, I used a few scraps of wire so that the final shape would be mostly rectangular, and covered everything with a piece of larger heat shrink tubing. 

Here you can see the heat shrink tubing is shrunk and holding things together nicely.


Now for a bit more epoxy to keep things nice and rigid. Note that the epoxy was applied with the adapter removed from the Garmin. the objective was to make the adapter more robust, not to adhere it forever in place.

And finally, a bit of double-sided tape to hold it in place. This allows it to be removed if necessary. I have the other end wired permanently behind my dash board. If I want to use the Garmin in a different car, I need to remove the adapter so that my normal USB power supply can be used.


With the first adapter completed, it is now time to discuss the other end. The second adapter that I built goes from the Garmin charging cable to the MagSafe connector. This one was made from the female end of a mini USB to micro USB cable and the MagSafe cable cut off of the MacBook power supply.

The solder connections here were similar, but only two were required.

  • Positive pin of the USB connector to the inner two MagSafe pins. 
  • Negative pin of the USB connector to the outer two MagSafe pins. 


Here you can see the right-angle Garmin power connector on the left plugged into the female mini USB connector on the adapter.

Here are the two adapters joined together through the power of magnets! (Not by the force.. Vader is not actively involved in the process; he just hangs out on my dashboard.)

And finally, a picture of what it looks like with the Garmin connected to power and clipped into the car mount.

When I am done using the Garmin, I simply unclip it from the mount and pull it away. The MagSafe connector pulls apart smoothly and the end stays behind, resting on the dashboard.

The semi-dangerous part of this is that if someone tried to charge your device with a normal MacBook power adapter, the voltage would be too high (18v) and your device would most likely be destroyed... So, avoid that.

One other limitation is that there are only two wires on the MagSafe connector from the MacBook power adapter. So, if you have a Garmin power adapter with the traffic antenna, the traffic part will not work any more. Only power can be provided through the MagSafe connector.


Tuesday, November 27, 2012

Screwpop Review

Before I begin today's regularly scheduled blog post, I must make an announcement. I am hereby declaring a regular schedule for my blog posts. From this day forward, I will be posting a blog every other Tuesday. I am committing to this publicly, in hopes that the risk of public embarrassment and shame will prevent me from reneging on this commitment. Wish me luck.

And now for something disappointing.

One of the things I have always wanted to carry with me is a Phillips screwdriver. Most pocket knives have good flat blade screwdrivers, but I find myself needing a Phillips version rather often.

I was rather excited to find this at thinkgeek.com:


It is called a Screwpop. It has several features that made me think it would be a perfect addition to my key chain.

  • It has a full-sized #2 Phillips screwdriver bit! If you pull it out and flip it over, there is a flat blade on the other side. 
  • It has a bottle opener!
Sadly, I cannot recommend this little guy. There are several drawbacks that I feel overwhelm the positive features of this tool. 

Complaint #1:  The bottle opener works poorly. It is even worse if there is a key ring going through the end of it. The opening on the Screwpop is not the right shape to easily fit over the edge of a bottle cap. I found that it took me several tries to open a bottle. This is disappointing, especially after being spoiled by another bottle opener that is such a joy to use, although it is not quite portable.

Complaint #2:  It is bulky. It takes up an excessive amount of space. I don't like carrying bulky items in my pockets. This is why I minimize the number of keys I carry. It is not worth dragging something around with me unless it functions especially well. 

Complaint #3:  The fit and finish was not as good as I would have expected. There were bits of the flash left at the seams from when the handle was cast. Not excessive, and nothing that a quick moment with a file couldn't fix, but still disappointing. 

Potential complaint #4:  It never happened to me while I carried it, but there is the potential to lose the screwdriver bit. It could fall out and be lost forever. The bit has spring-loaded detent to hold it in place, which makes it difficult to replace. A plain bit would just fall out. 


The one positive, was that the Phillips bit worked very well. However, I am convinced there must be a better option. It also makes me glad that thinkgeek.com is no longer selling this item. I do not know if it was because it didn't meet their normal standards, but I hope that is the reason. I like that site, and it made me sad that they carried something that didn't live up to its potential. 

Tuesday, November 20, 2012

Radio Update

In December of last year, I wrote about my new radio. There was a minor, purely cosmetic issue with the display when listening to podcasts. I had promised to provide updates as I learned more. Better late than never...

The radio was purchased through Crutchfield. A site which has good name recognition, prides itself on customer support, and has slightly higher prices than can be found elsewhere.

I posted on their support forum, so that there would be a record if other people had the same problem. They were quick to reply, but the replies were not that helpful.

If I had been willing to return the radio over such a minor issue, I am sure they would have paid more attention to coming up with a solution. However, to me it wasn't worth the shipping costs, hassle, and time without a working radio to send it back. Especially if they didn't have a fix for the problem.

Based on my experience, I don't think I would purchase from them again unless they were the lowest price. It was not a negative experience overall, but it definitely wasn't worth paying a premium.


Now for some feedback on the radio itself after about a year of use.

  • The display is very difficult to see in bright daylight. The screen just isn't bright enough. 
  • There is terrible glare on the screen that makes it even harder to see. The angle of the display makes the glare worse from the driver's seat. The older version of this unit didn't have this issue. Alpine created the problem with the newer version.
  • There are also a couple quirks to the user interface that are annoying. Mainly, once you choose the shuffle all option, everything is shuffled until you tell it to stop. Including podcasts and audiobook chapters. 
  • There is no good way to mute the unit when listening to radio stations. 

The iPod interface is still one of the best I've encountered. It is fast, responsive and easy to use. I'm not going to buy a new radio any time soon, but I'm not sure if I would buy it again if I had the choice. I'm a little disappointed in Alpine on this one. 

Tuesday, November 13, 2012

The Best Highlighter

My triumphant return to blogging is brought to you by...  a highlighter.

Well, not just a highlighter. Some portion of the credit has to go to the constant admonishment from my best friend for failing to post for six months. This one is for you, Mike.

Allow me to introduce you to the Sharpie Gel Highlighter.


Now, these are not your normal, run-of-the-mill highlighters. These are crayons for adults. Magnificant crayons. (You remember how much fun coloring with crayons was, right?)

There are four reasons why I love these things.
  1. They do not bleed through the paper. At all. 
  2. They are less likely to smudge what you are highlighting. (Not perfect, but pretty good. Keep reading for more on this.)
  3. They do not dry out. At all. 
  4. It is obvious when the highlighter is low or empty. There is no gradual fading away or annoying period of reduced performance before you eventually get fed up and throw it away.  

Here is an illustration of the smudging.


These are not before and after shots. The picture on the left was scanned; the picture on the right was taken with my cell phone. It turns out that my scanner cannot see the highlighter. I find this fascinating... Anyway, I went to town highlighting these different inks immediately after writing. You can see the amount of smudging. The pencil and Sharpie marker were not affected. Ball point and gel inks were, to some extent. Unlike a normal highlighter, the tip of the gel highlighter was not fouled by the smeared ink. It continued to write in the correct color, without spreading the smudged ink to the next place it was used. 

The next thing I did was try to write over the highlighter. These are the horizontal lines beneath the words written in each ink. Pencil seemed largely unaffected. It wrote ok on the layer of highlighter. The normal ball point pen wrote almost as well. Gel ink had more difficulty and the Sharpie marker didn't like it at all. I had to scribble in the bottom left corner for a while before my Sharpie marker would write again. 

I also like the vibrant yellow color of this highlighter. I have only tried the yellow so far; the others are on their way from Amazon. I couldn't find the five-color set of these locally.

The only other drawback is that these are less precise than a chisel tip highlighter. The changing shape of the tip as it is used makes it more difficult to write exactly where you intend. This has never bothered me, but if you are more of a perfectionist, you should keep that in mind. 


Monday, February 20, 2012

Craftsman Cap Wrench

I love well-made tools. Objects that serve their purpose in a steadfast, understated, and seemingly effortless manner.  The Craftsman Cap Wrench Bottle Opener is one such tool. The name is slightly deceptive since it operates with a prying motion, and not the twisting motion you would tend to expect from a wrench, but I am willing to overlook that small marketing flaw. 


Like all bottle openers, it is a very simple tool. Its entire purpose is to apply a small bit of leverage to pop the caps off of bottles of beer.


Upon first glance, it doesn't look all that special. There is the obvious attempt to appeal to fans of their hand tools. It appears to be a good excuse to get you to spend $15 on a bottle opener, most likely as a gift. The beauty of the design is not obvious until you actually use it.

First, a short description. There is a raised dome built into the center of the openingrench. This pushes against the center of the bottle cap and acts as the fulcrum. There are two metal ears on that catch the edge of the cap. These are at opposite ends:  one by the handle and one on the far end. You can use either one, resulting in a prying up or prying down motion respectively. In the picture below you can see the unused ear by the handle, with the edge of the cap caught by the ear on the other side. This would be for the prying down motion.


The dome has the secondary purpose of preventing the cap from falling down into the opening where the combination of the two ears could make it difficult to remove. That pitfall is cleverly avoided.

The really beautiful design feature is how the two ears interact. When you catch the edge of the cap with one ear, the other pushes against the opposite side of the cap, preventing the wrench from slipping off. It takes almost no effort to keep the wrench on the cap. It almost feels like the weight of the wrench is enough by itself to open the bottle. It is incredibly easy to use. 


Sure, you probably don't really need such a massive chunk of forged steel to open a beer bottle, but if you're anything like me you will want your own as soon as you use one.

Wednesday, February 8, 2012

Modified Brew Hauler

Beer is heavy.

Five gallons of beer in a glass carboy is very heavy. At about 8.3 pounds per gallon, plus 10 to 15 pounds for the carboy, the total comes out north of 50 pounds.

Dropping a glass carboy full of beer would not be a fun experience. First there is the mess. Then there is the expense of ingredients, carboy, and the wasted time you spent brewing. And finally, there is the risk of severe personal injury. There are numerous horror stories on the internet about people cutting themselves on broken glass carboys.

Given all of that, it seems prudent to take some precautions. This is especially true since these heavy glass containers are often wet and slippery at the times they need to be moved.

Luckily there is a good, commonly-available, and inexpensive solution:  the Brew Hauler. It is a carrying sling made of nylon webbing that gives you two perfect handles for securely lifting and carrying a full carboy. This is incredibly helpful when lifting it in and out of a chest freezer.

The only complaint I have with the design of the Brew Hauler is that it sags. (If you look closely at the picture from Austin Homebrew, they had to use tape to keep it in place.) I was never able to tighten the top strap enough so that it would stay on its own. Even if I were able to, I would have to redo it each time I moved it to a different size of carboy. I have to admit that this is a relatively minor complaint. However, when it sags, it makes it easier for the straps that support the bottom of the carboy to shift. This could result in the carboy slipping out from between those straps if care is not taken to realign them before lifting.

My solution was to add a bungee cord to the top strap. This keeps the brew hauler snugly in place around the carboy. The materials are simple. All you need is one 24" bungee cord and four hose clamps. Any style of hose clamp that is about the right size should work just fine.

I used Oetiker style clamps because I had them lying around. They are stainless steel, which means they won't rust if they get wet with spilled beer or condensation. They are rather permanent once crimped, and there are no sharp edges or protrusions that could get caught on something. One of the clamps and the crimping tool are pictured below.


Step 1: Cut the hooks off of the bungee cord. They are not necessary and would just be in the way. Then singe the ends of the nylon sheath around the bungee cord's core with a match or lighter. This is just to prevent the cut ends from fraying or unraveling.

Step 2: Clamp one end of the bungee cord to the non-adjustable side of the buckle on the top strap. See the picture below. I used two clamps, which may be overkill, but I am confident that the bungee cord isn't going anywhere.

Step 3: Pull the bungee cord through each of the loops on the handles and lower straps. This is just like putting a belt on through belt-loops.

Step 4: Clamp the other end of the bungee cord to the strap on the adjustable side of the buckle. The only semi-tricky part is to make sure that the bungee cord is placed correctly. With the bungee cord completely relaxed, there needs to be 3 to 4 inches of slack in the webbing between the two sets of clamps. This way, when the webbing is pulled tight, the bungee cord is forced to stretch and maintain tension.

This end also shouldn't be clamped too close to the buckle. There needs to be enough adjustment  to pull the webbing tight around the smallest diameter carboy on which it will be used. As you can see below, I left a couple extra inches just in case. There are two clamps on this end as well; one is covered by the loop on the nylon strap. You can also see the singed end of the bungee cord in this picture.


For me, this has made a good product even better. I ended up buying and modifying a second Brew Hauler  so that I have one for each carboy when doing two batches at the same time. It was annoying to remove the Brew Hauler from the carboy after it was in the chest freezer and then try to put it back on later when it was time to rack the beer. These are great things to have around, and I highly recommend getting a couple.

Wednesday, February 1, 2012

My Brewing Fridge


I recently got into the hobby of homebrewing beer, and I really like lagers.

One of the more important pieces of equipment for brewing lager beer is some type of refrigerator. To keep the yeast happy (and happy yeast makes better beer) it must ferment and condition at the correct temperatures. For ales, you can often get away with brewing at room temperature. Lagers on the other hand require temperatures in the 50s.

The choice faced by homebrewers is what type of beer fridge to use. The two standard options are either an upright fridge or a chest freezer. Either one will require an external temperature controller for best results. I went the chest freezer route, and here is how I came to that decision.

The Refrigerator

Pros:

  • Easier to fill. You don't have to lift heavy items very high at all to get them in and out of the fridge.
  • More durable. A fridge is designed to operate above freezing. It should last many years.  
  • No condensation issues. A fridge is designed to collect and drain off condensation from the air instead of allowing it to collect inside the fridge. 
Cons: 
  • Limited capacity. A normal fridge has less room for kegs and carboys than is available in most chest freezers. 
  • No secondary containment. When you open the door, any liquid in the bottom of the fridge will drain out. Rapidly.
  • Less efficient use of space. The freezer portion of the refrigerator is pretty much useless at this point. 

The Chest Freezer

Pros: 
  • More usable space. I can easily fit two carboys or three 5-gallon kegs in my 7 cubic foot chest freezer. 
  • More efficient. Chest freezers tend to have thicker insulation than refrigerators because they are designed to operate at lower temperatures. This means it should use less electricity.
  • Secondary containment. Any liquid that leaks will collect in the bottom of the freezer, and it will stay there until you remove it. 
  • Fits better in an apartment. A chest freezer is not nearly as imposing as a second fridge. It also doubles as extra counter space. 
Cons:
  • Questionable durability. Chest freezers are designed to operate below freezing. The evaporator coils are usually made of mild steel. This is fine for something that will only be exposed to ice, but when operated above freezing, liquid water can cause corrosion. The expected lifespan for a chest freezer in this application is probably only a few years. (Some precautions, of unproven effectiveness, can be taken - like caulking any seams in the internal lining to prevent water from migrating in to the evaporator coils.) 
  • Condensation. Every time you open the freezer, room-temperature air laden with humidity rushes in. When this air is cooled, the water condenses out and collects as puddles in the bottom of the chest freezer.  (This is mostly just an annoyance in my experience.) 
  • Harder to fill. Anything holding 5 gallons of liquid is heavy. Kegs, carboys, and CO2 cylinders all have to be lifted up and into the chest freezer. 

To be fair, the value of secondary containment did not cross my mind until after I already had the chest freezer and had kegged my first batch of beer. A misbehaving CO2 pressure regulator slowly forced beer out through the faucet. I did not discover this until the next morning. I opened the lid on the chest freezer to discover two inches of beer sitting in the bottom. It was tragic and heartbreaking to lose two to three gallons of beer. It would have been so much worse to wake up to two to three gallons of beer on the floor of my apartment. 

I have rationalized away the shortcomings of the chest freezer. Condensation is easy to dry off periodically with a towel. Lifting items in and out is a good workout. If the evaporator coil fails eventually, it gives me an excuse to tinker and come up with a way to possibly eliminate the condensate issue.. But until then, I am very happy with my chest freezer. I was happy enough to buy a second one so I could ferment and condition different batches at the same time.      

Tuesday, January 24, 2012

Low-cost Cable Management

There are many ideas out there for cable management using common items like binder clipswire shelving, or rain gutters. The general idea is to use something to keep all the cords and cables behind your desk off the floor, organized, and out of sight.

This is my version.

I had a few of these corner braces left over from some prior project. They are 3 inches on each side. A package of 4 costs under $4 at Home Depot.

Now, I know what you're thinking. L-shaped pieces of metal are not so useful for cable management.


Simple solution:  bend them into a more useful shape!

A hook is much better suited for this sort of thing. Modifying the braces is relatively easy with the right tools. Most things are...

Step 1 - Clamp the corner brace in a vise. 


Step 2 - Use a pair of pliers and bend one leg of the brace 90 degrees. 


Step 3 - There is no step 3. You are done modifying the brace at this point.. I said it was easy. Now repeat steps 1 and 2 for each of the braces you will be using. 


Finally, attach the newly improved braces to your desk or table.

There are a couple options. You can use the top hole on the long side of the hook to screw the hooks in place. I ended up going with a less permanent option. This is mostly because I was attaching the hooks to the metal legs of my workbench and didn't want to drill holes. I used a strip of double-sided tape on the long side of the hook.

I was a little worried that the tape wouldn't hold, but I haven't had any problems.The only limitation of this design is that it requires a vertical surface for the braces to attach to.